Rust WebAssembly Hello World - Deep Dive with wasm-bindgen and wasm2wat
In this article we are going to create a WebAssembly Hello World program with Rust. You might be thinking that a WebAssembly Hello World tutorial could be found almost everywhere, including one on Mozilla website and rustwasm.github.io. So why would you need to read this article?
This article is different as we are going beyond just getting the Hello World program to work. We will dig deeper to understand the codes generated by wasm-bindgen and how they all come together to help us with our development. The WebAssembly Binary Toolkit will also be used to explore the generated wasm code. This will give us a good understanding of Rust WebAssembly and a good foundation to start with. It also quickly becomes clear why Rust WebAssembly applications are smaller and more optimized as compared to other frameworks with Garbage Collector, and why it is a winner for developers with existing JavaScript web applications or websites. Things like web-sys (Raw API bindings for Web APIS) and WASI (WebAssembly System Interface) also become easier to appreciate.
Prerequisites
- Rust is installed - See https://www.rust-lang.org/tools/install
- Webpack is installed
- WebAssembly Binary Toolkit (wabt) is installed
Hello World Tutorial in Rust WebAssembly
1. Install wasm-bindgen. There are other ways to create a Hello World program without wasm-bindgen. But in this tutorial, we are going to use it as it is essential in Rust WebAssembly development.
cargo install wasm-bindgen-cli
Rust WebAssembly enables you to surgically insert WebAssembly modules into your existing JavaScript applications, especially into your performance critical code paths. You can think of wasm-bindgen as a tool that helps you do that by generating the glue and bindings for the efficient interactions between JavaScript and WebAssembly.
2. Next, we will like to create a new Rust WebAssembly project. Enter the following command
cargo new helloworld --lib
You should see the following message. A new helloworld package with your project files has been created.
Created library `helloworld` package
3. Using a text editor, open Cargo.toml. You should see the following
[package]
name = "helloworld"
version = "0.1.0"
authors = ["djembe-waka "]
edition = "2018"

[dependencies]
Change it to the following:
[package]
name = "helloworld"
version = "0.1.0"
authors = ["djembe-waka "]
edition = "2018"

[lib]
crate-type = ["cdylib"]

[dependencies]
wasm-bindgen = "0.2"
The "cdylib" indicator makes this Rust project expose a C-style dynamic library that is used by linkers to produce our WebAssembly module. As described above, "wasm-bindgen" enables or facilitates high-level interactions between wasm modules and JavaScript.
4. Using a text editor, open "src/lib.rs". Change it to the following:
extern crate wasm_bindgen;
use wasm_bindgen::prelude::*;

// Import 'window.alert'
#[wasm_bindgen]
extern "C" {
	fn alert(s: &str);
}

// Export a 'helloworld' function
#[wasm_bindgen]
pub fn helloworld(name: &str) {
	alert(&format!("Hello World : {}!", name));
}
In the above code, "wasm_bindgen" allows us to import JavaScript things ('alert') into Rust and export Rust things ('helloworld') to JavaScript.
5. Compile the code. In your command line enter the following:
cargo build --target wasm32-unknown-unknown
If "wasm32-unknown-unknown target" is not installed, enter the following to install it.
rustup target add wasm32-unknown-unknown
6. Setup a web server to run our program.
We need a web server to test our WebAssembly "Hello World" program. We are going to use Webpack but you can also use another tool or web server that you are comfortable with. We need to create 3 files: index.js, package.json and webpack.config.js. However, we will not be going into the details of these files as we are going to focus on the codes generated by wasm-bindgen.
index.js
const rust = import('./pkg/helloworld');

rust
  .then(m => m.helloworld('World!'))
  .catch(console.error);
package.json
{
  "scripts": {
    "build": "webpack",
    "serve": "webpack-dev-server"
  },

  "devDependencies": {
    "@wasm-tool/wasm-pack-plugin": "0.4.2",
    "text-encoding": "^0.7.0",
    "html-webpack-plugin": "^3.2.0",
    "webpack": "^4.29.4",
    "webpack-cli": "^3.1.1",
    "webpack-dev-server": "^3.1.0"
  }
}
webpack.config.js
const path = require('path');
const HtmlWebpackPlugin = require('html-webpack-plugin');
const webpack = require('webpack');
const WasmPackPlugin = require("@wasm-tool/wasm-pack-plugin");

module.exports = {
    entry: './index.js',
    output: {
        path: path.resolve(__dirname, 'dist'),
        filename: 'index.js',
    },
    plugins: [
        new HtmlWebpackPlugin(),
        new WasmPackPlugin({
            crateDirectory: path.resolve(__dirname, ".")
        }),
        // Have this example work in Edge which doesn't ship `TextEncoder` or
        // `TextDecoder` at this time.
        new webpack.ProvidePlugin({
          TextDecoder: ['text-encoding', 'TextDecoder'],
          TextEncoder: ['text-encoding', 'TextEncoder']
        })
    ],
    mode: 'development'
};
You may require the following commands if some of the packages are not available on your system.
- npm install webpack --save-dev
- npm install webpack-cli --save-dev
- npm install webpack-dev-server --save-dev
- npm install html-webpack-plugin --save-dev
- npm install @wasm-tool/wasm-pack-plugin --save-dev
- npm install text-encoding --save-dev
7. Build the program by running the following command:
npm run build
8. Run the Hello World program
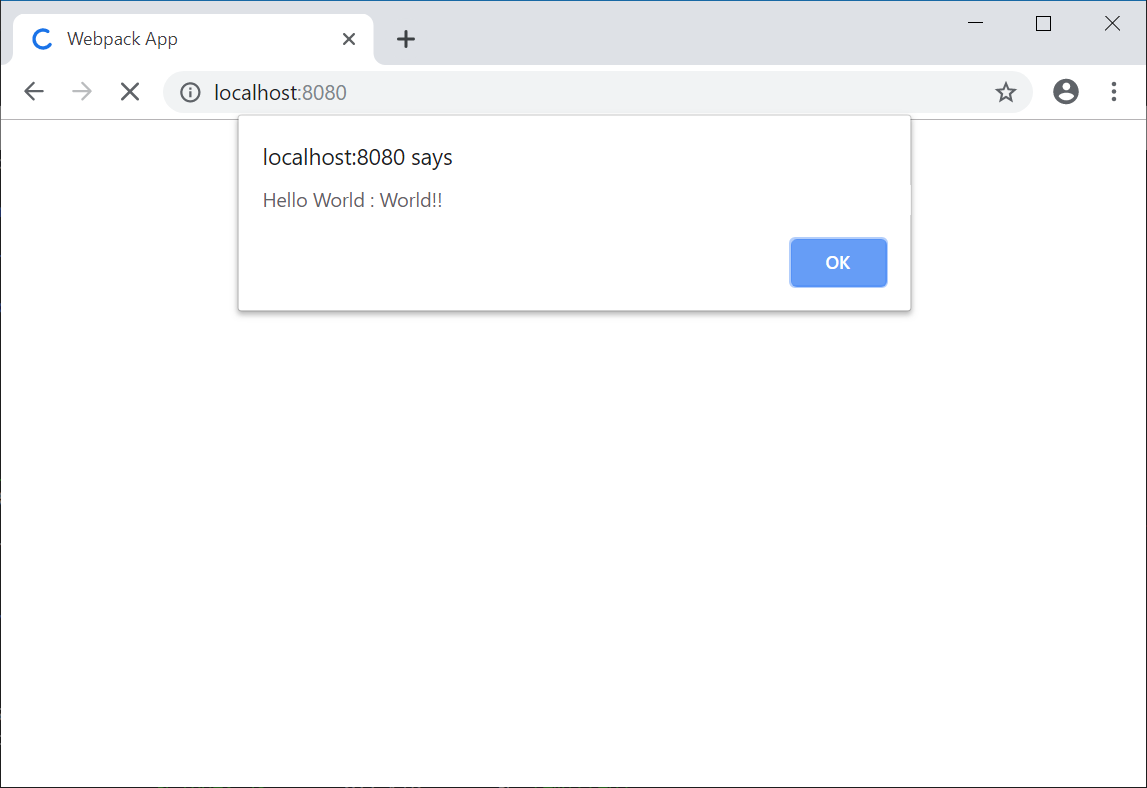
npm run serve
Navigate your browser to "localhost:8080" and see a "Hello World!" alert being displayed.
8. Now that we got the Hello World program running, we want to dig deeper. Go to the "pkg" folder and see that the following files are automatically generated for you during the build process.
- "helloworld_bg.wasm"
- "helloworld.js"
- "helloworld.d.ts"
- "package.json"
The files can also be generated manually by using the following wasm-bindgen cli command.
wasm-bindgen target/wasm32-unknown-unknown/debug/helloworld.wasm --out-dir ./pkg
9. The first thing we should do is to understand what happens when we run the Hello World program in a browser. The following shows the sequence of function calls (or more specifically the files containing the functions) that occur when we navigate point to "localhost:8080" in the browser.
index.js -> helloworld.js -> helloworld_bg.wasm
index.js
const rust = import('./pkg/helloworld');
rust
  .then(m => m.helloworld('World!'))
  .catch(console.error);
"index.js" imports a "helloworld.js" package and calls the "helloworld" function in the package.
helloworld.js
export function helloworld(name) {
    const ptr0 = passStringToWasm(name);
    const len0 = WASM_VECTOR_LEN;
    try {
        return wasm.helloworld(ptr0, len0);

    } finally {
        wasm.__wbindgen_free(ptr0, len0 * 1);

    }
}
"helloworld.js" file is automatically generated by wasm-bindgen and contains the JavaScript glue for importing DOM and JavaScript functions into Rust. It also exposes an API on the generated WebAssembly functions to JavaScript.
Rust WebAssembly focuses on integrating WebAssembly with existing JavaScript applications. To do this, we need to pass different values, objects or structs from JavaScript in and out of WebAssembly functions. This is not easy as the different object types of two different systems need to be reconciled. To make matters worst, WebAssembly currently only supports integer and floating point numbers, not strings. This means you cannot simply pass a string into a WebAssembly function.
To pass a string into WebAssembly, you need to convert the string into numbers (note the TextEncoderAPI specified in webpack.config.js), put the numbers into the memory space of WebAssembly and finally return a pointer of the string to the WebAssembly function so that you can use it in JavaScript. At the end of it, you will need to free up the WebAssembly memory space used by the string.
If you look at the above JavaScript codes, this is exactly what has been executed automatically. The "helloworld" function first calls "passStringToWasm". This function creates some memory space in WebAssembly, converts your string to numbers, writes the numbers to the memory space, and returns a pointer to the string. The pointer is then passed to "wasm.helloworld" to perform your JavaScript "alert". Finally, "wasm.__wbindgen_free" frees up the memory. If you are just passing a simple string, you may be able to do this by yourself, but think of when you have more complex objects and structs, the effort quickly becomes non-trivial. This illustrates the importance of wasm-bindgen in Rust WebAssembly development.
10. In our previous step, we noted that a "helloworld.js" file is generated by wasm-bindgen, and the functions generated in this file call into our generated WebAssembly codes in "helloworld_bg.wasm". Basically, "helloworld.js" acts as a bridge between other JavaScripts such as index.js to the generated "helloworld_bg.wasm" WebAssembly.
We can explore "helloworld_bg.wasm" further by entering the following command:
wasm2wat helloworld_bg.wasm > helloworld.txt
This command uses the WebAssemblyBinary Toolkit to translate WebAssembly to WebAssembly text format and saves it to a "helloworld.txt" file. Open "helloworld.txt" in a text editor and look for the "$helloworld" function. This is the generated WebAssembly function of our "helloworld" function that we have defined in "src/lib.rs".
Look for the following line in "helloworld.txt":
(export "helloworld" (func $helloworld))
This line exports the "helloworld" wasm function for the host to call. We call this wasm function through "wasm.helloworld" in "helloworld.js".
Next, look for the following line:
(import "./helloworld.js" "__wbg_alert_7e2b9b91978b2246" (func $__wbg_alert_7e2b9b91978b2246 (type 2)))
This corresponds to the following JavaScript function generated in "helloworld.js"
export const __wbg_alert_7e2b9b91978b2246 = function(arg0, arg1)
This is the part where wasm-bindgen provides a glue to help you use JavaScript functions or the DOM in WebAssembly. With this, we now understand how wasm-bindgen helps us facilitate interaction by importing JavaScript things and exporting WebAssembly things.
11. Finally, let's take a look at the other files generated by wasm-bindgen.
"helloworld.d.ts"
This .d.ts file contains TypeScript type declarations for the JavaScript glue and is useful if your existing JavaScript application is using TypeScript. You can have your calls into WebAssembly functions type checked or have your IDE provide autocompletions. If you aren't using TypeScript, you can safely ignore this file.
"package.json"
The package.json file contains metadata about the generated JavaScript and WebAssembly package. It automatically fills in all the npm dependencies from your Rust code and enables you to publish to npm.
What further understanding can we draw from the above?
Take a look at the following code again:
helloworld.js
export function helloworld(name) {
    const ptr0 = passStringToWasm(name);
    const len0 = WASM_VECTOR_LEN;
    try {
        return wasm.helloworld(ptr0, len0);

    } finally {
        wasm.__wbindgen_free(ptr0, len0 * 1);

    }
}
The code to allocate and deallocate the memory is carried out for you. There is no need for a Garbage Collector or a full framework engine making WebAssembly applications or modules written in Rust small and optimized. Other languages that require a Garbage Collector will need to include wasm code for their underlying framework engine. So, no matter how optimized they are, their size will not be smaller than what Rust provide. This makes Rust WebAssembly a good choice if you need to integrate or inject small WebAssembly modules into JavaScript web applications.
Other things to note beyond the Hello World
web-sys
With wasm-bindgen, we can call a JavaScript function in Rust WebAssembly by using an "extern". Remember the following from "src/lib.rs":
#[wasm_bindgen]
extern "C" {
	fn alert(s: &str);
}
The Web has a huge number of APIs, from DOM manipulation to WebGL to Web Audio. So if our Rust WebAssembly program grows, and we need to make many different calls to Web APIs, we will need to spend time writing a lot of "extern" code. web-sys serves to act as a frontend to wasm-bindgen to provide the raw bindings to all the Web's APIs. This means if you use web-sys, you can save time by not having to write the "extern" code.
WASI (WebAssembly System Interface)
This is a standardization effort to push WebAssembly beyond the browser. To run WebAssembly on a machine or OS (Operating System) outside the browser, we may need to access system resources. This standardization specifies how you can access these system resources in a secure and yet portable way across different machine architectures. Currently, there are already two implementations, Wasmtime by Mozilla, and Lucet by Fastly. And we need to ask ourselves, will WASM + WASI become the next Docker?
WebAssembly
Blazor Topics
- Blazor Hello World
- Blazor Components
- Blazor Dashboard
- Blazor Charts
- Blazor Donut Chart
- Blazor Pie Chart
- Blazor Bar Chart
- Blazor Line Chart
- Blazor Data Binding
- Blazor Events
- Blazor Cascading Values & Parameters
- Blazor BuildRenderTree
- Injection (coming soon)
- Layout (coming soon)